Labels

Showing posts with label Upcycled cardboard boxes. Show all posts

Monday, May 19, 2014

Handmade Jewelry box


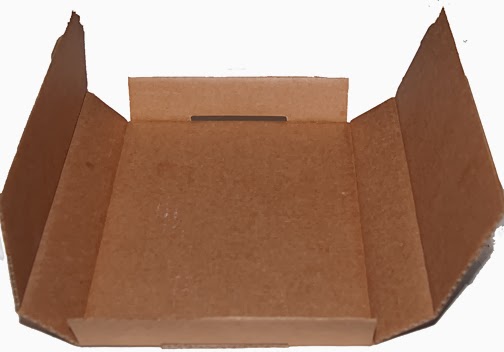
For this jewelry box, I started with a box that was packaging for something that came in the mail. I measured the depth of the box, and then used that measurement for a grid I drew on top of the box.

I cut out the center square, and then cut diagonally at the corners. I then folded the remaining cardboard into the box and glued it in place using tacky glue. I then cut out a piece of cardboard to fit in the bottom of the box.  I ripped pages out of an old phone book, and glued them to the box using Mod podge. I did this to reinforce the box and hold all the pieces in place. After the glue dried I painted the entire box with gesso.
I have a lot of paper towels and baby wipes that I have used for soaking up paint in projects that use watered down paint. I save them because they are pretty and strong enough for collage.
I covered the inside and outside of the box with the colored paper towels.
I cut out a piece of canvas board with an exacto knife to use as the lid. I cut it to be a little bit lager then the opening of the box. I covered most of the board with the colored paper towels.
I cut a smaller piece of canvas board to go on top of the lid. I covered the board gesso, and then painted it green.
I painted watered down red paint over the green, then dripped alcohol onto the paint. After the paint dried added some shading. For more information on this technique check out acrylics & alcohol painting. 
I glued the painting on top of the lid using tacky glue.
  I pushed green plastic thumbtacks into the corners of the bottom of the box, and then glued them into place.
I like how the box turned out, so colorful.

Tuesday, May 13, 2014

Blue and orange collage, stationery box


I recycled a box similar to this one already; Upcycled steak box, becomes a stationery box.  You can check it out, if you would like to see how I made the box. To decorate this box I took a painting I made with glue and watercolor and made a collage for the outside of the box. If you would like to see how I made the painting check out Watercolor and glue 

 I painted the inside of the box with acrylics, then glued pieces of parchment paper I had drawn on to the box, and then I added shading and shadows on and around the paper.
 
I might go back sometime and add a quote or something to the inside of the box to tone it down a little bit. But for now, I think I’ll keep it like it is.

Tuesday, December 10, 2013

Upcycled 12 pack box

I enjoy making the boxes out of the of the 12 pack containers. It is a simple process, and when you are finished you have a 3D canvas to work with.
I decided on a depth for the box (about 4 inches) and then folded the rest of the cardboard into the box for reinforcement.

For some reason that eludes me, there were four phonebooks left on my doorstep. I like to wrap the boxes I make with paper to help glue the cardboard in place. I used the paper from the phonebooks because I had a lot to spare.

 
I cut up an old canvas with my exacto knife for the lid.
I then covered the box and lid with slick pages from an old magazine using mod-podge.

I wanted to paint on the box, and it is hard to paint on slick pages, so I painted the box and lid with gesso that I colored with some red acrylic paint.

To give the box some texture, and to lighten the color, I covered the box and lid with yellow tissue paper.


Using pastels, permanent markers and colored pencils I colored the box and lid. To start with I tried to follow the pattern from the magazine pages. I did not like how it turned out, so I covered everything I did not like with more tissue paper and gesso.  Then I just painted random shapes around the veins from the tissue paper.


I was happy with how that looked, so I sprayed box and lid with sealant. I love how this box turned out.

Thursday, November 28, 2013

Upcycled 12 pack 7up box

I love how this box turned out! I made a simple box, then I used it to try out some ideas I had.
 
I started with the cardboard box that cans of 7up come in.

I decided on the height I wanted the box to be, about 3.5 inches. Then I measured another 3.5 inches for to fold over. I cut the along the corners of the part I would fold over.

I folded the top half over, then glued it in place using Mod Podge.
I reinforced the bottom by gluing leftover cardboard on the bottom of the box.
I glued resume paper to the entire box, but you could use any paper you wanted to. I then painted the box inside and out with gesso.
I then glued stain glass scrapes to the box using a clear glue for glass. You don't have to use stained glass, flat marbles or pieces of pottery would work.
I then added some orange paint to Laticrete wall grout and mixed it up following the directions on the box.  You don't have to ad the paint to the grout, if you want to buy pre-mixed grout you can paint it when it dries.
Next I removed most of the grout from the glass, and painted inside and out with liquid acrylic paint.
To make the lid I cut a piece of orange stained glass to fit. I covered the edges with copper foil then tinned the foil. I applied copper patina to the solder. If you want a stained glass lid, but don't have stained glass around like I do, you can go to a stained glass shop and ask them to cut you a square to fit your box. Or you could make the lid out of cardboard or chipboard.
I used scrap glass for the lid, you could use flat marbles or broken pottery.
I glued the stained glass and flat marbles to the lid using glass glue.
I painted yellow over the grout to make it a lighter orange, then I painted red under the glass and light yellow over the glass to give it a shadow effect.


Saturday, November 16, 2013

Upcycled cardboard box, becomes a box for a handmade book

Materials needed
Cardboard box
Charcoal paper
Oil pastels
Baby oil
Mod podge
Black construction paper
Mesh yarn
Grid paper
Watercolor crayons
Black ink
 Someone gave me this box, I don't know what it was used for so I don't know what to call it. The box you use will work if it opens in the front.
I cut off the tabs on the front panels and the flaps on the side panels.
Using grid paper and glue I I connected the side panels forming a tray. Then I covered the entire box with grid paper. You don't have to use grid paper, any kind of paper would work. I used grid paper because I thought it would look good under my artwork.
For the front of the box I used a drawing I made with oil pastels. For the drawing I drew in the trees first using black and brown oil pastels. I blended the pastels using baby oil. Behind the tree is a sunrise, green and brown for grass, gray for mist, then red, orange and yellow for the sunset. I blended the colors into each other using baby oil.
I cut the picture in half and glued it to the front, sides and a little bit on the back using Mod Podge.
I cut out a piece of charcoal paper and glued it to the back and center panels. At first I had planed on drawing on the paper, but I liked the look and feel of it plane.

To finish the edges on the flaps in the front I cut strips of black construction paper. I folded the strips of paper in half, then glued them over the edges of the flaps.

On the inside, I painted a sunset using watercolor crayons, then drew trees on top with black ink. I cut a piece of black construction paper to fit the bottom of the tray. I don't like the inside of the box. When I finish the handmade book that is going in the box, I'll change the inside. You could use anything you want for the outside and inside. If you are making the box for a art journal or hand made book, you can design the inside and outside to match the book or art journal.
To hold the flaps shut and to add more color I finished the box off by wrapping mesh yarn around the box twice and then tied a big bow. I think the box is perfect for a little homemade book. The book is taking longer to make then any box I made. I'll post a picture when I'm finished.


Friday, November 15, 2013

Upcycled steak box, becomes a stationery box


Materials needed
Steak box
Scrapbooking paper
Soft pastels
Glitter
Ribbon
Markers
Watercolor pencils
Mod Podge
Mod podge puzzle saver
Glue gune
I started with a box steaks came in.


I cut off the tabs and cut a piece of cardboard to fit across the back of the bottom of the box to form a tray.

I covered the entire box with resume paper using mod podge.  I used resume paper because that is what I had. You can use book pages or sketch paper.
I drew a yellow bird on a branch on the top of the box using soft pastels. You don't have to draw a picture, you can use scrapbook paper or a yard sale picture.
Next I took some pink scrapbook and ripped out the corners and glued them to the corners of the box. I ripped the paper on the bird a little bit, and painted a light brown wash over the bird and background using watercolor pencils. Using watercolor pencils I painted the edges of the scrapbook paper red.

I outlined the flowers with magic markers and glued glitter on the flowers. I painted more red on the edges of the scape book paper, and outlined the inside with black ink.


I thought the edge was too smooth, so I took a wet sponge to the edge and ripped and tore it until it looked a lot more ragged. Using pastels I drew in more trees, sky and fixed up the bird a little bit. I used pastels because I think it is a good contrast to the paper. I filled in more dots on the paper.

I covered the entire box with a sealant. I put more glitter on the flowers, than I used mod podge puzzle saver on only the paper to give it a glossy finish. I bought the mod podge puzzle saver by accident. It goes on thick and is very glossy, it gives the paper a plastic feel.
I made a pull from some red velvet ribbon I think mom had left over from the 60's. I attached it to the inside of the lid using my glue gun.
The look I was going for was shiny paper ripping off to show an old painting underneath. I am happy with the way it turned out.